How to Turn Any Photo into an AI Christmas Photo at Home
A step-by-step playbook to take one normal picture and turn it into a print-ready AI Christmas photo with ThatMoment.Studio.
Key Takeaways
- Professional Christmas photos in minutes
- No photography skills required
- 30 unique variations from one photo
- Perfect for holiday cards and gifts
How to Turn Any Photo into an AI Christmas Photo at Home
One everyday picture is enough. This guide shows you exactly how to capture it, upload it, pick the right preset, and download a print-ready AI Christmas photo you will be proud to mail or frame. It is written for busy parents and couples who only have 10 spare minutes but want results that look like a studio session.
Create your AI Christmas photo now if you prefer to jump straight in, then come back to follow the optimization steps below.
What you need (2-minute prep)
- A clear source photo: at least 3000x4000 pixels, not a screenshot.
- Window or soft lamp light: stand 3-4 feet from the light source.
- Neutral outfit or one hero color so the AI can add texture cleanly.
- Space above your head in the frame to leave room for garlands or snow.
- Stable phone placement: lean it on a shelf or use a quick tripod to keep framing steady.
Step 1: Capture the right base photo
Frame for the final AI Christmas photo
- Shoot at chest level or slightly above to avoid wide-angle distortion.
- Leave 20-30% empty space above the head and around shoulders for décor.
- If you want a couple or family shot, stagger heights to create a triangle composition.
Lighting that survives any preset
- Turn off overheads; use a window or lamp aimed at a wall for bounce light.
- Match light direction to the preset vibe: warm light for fireplace looks, cooler light for snowy scenes.
- Avoid mixed color temperatures (one warm lamp plus cool window) so skin tones stay consistent after AI editing.
Poses that stay natural after AI edits
- Keep hands visible but relaxed—around a mug, a gift box, or linked together.
- Soft smile or gentle gaze works better than a wide grin once dramatic lighting is added.
- For kids, photograph them while they hold a favorite toy to keep still for 2-3 seconds.
Pro tip: Shoot 5-7 quick variations (chin slightly up/down, shoulders relaxed) and pick the calmest expression before uploading.
Step 2: Upload to ThatMoment.Studio with intent
- Go to the homepage to create your AI Christmas photo and tap Upload a Photo.
- Choose the cleanest version of your shot (avoid filtered copies).
- Add 1-2 lines of guidance in the request box, such as "warm fireplace glow, knit textures" or "snowy forest at dusk, keep our navy sweaters".
- If a pet or toddler is included, note "keep hands visible, keep pet face clear" so the model preserves them.
Step 3: Pick the preset that matches your input
- Cozy Fireplace / Elegant Holiday: Best when your outfit is warm-toned or neutral and your photo already has warm light.
- Snowy Forest / Romantic Winter: Choose when your outfits are cooler blues/greens or when you want cinematic dusk light.
- Modern Minimal / Nordic Calm: Perfect for neutral outfits and clean backgrounds; preserves simplicity without clutter.
- Gift Box Fun / Santa & Kids: Great for playful toddler shots and bright outfits; keeps energy without over-brightening faces.
If you are unsure, generate two presets with the same upload. Pick the version that keeps skin texture and true eye shape—the best signal of a strong base photo.
Step 4: Review, pick, and iterate quickly
- Zoom to 100%: check eyes, hands, and edges of coats or dresses for warping.
- Run a second pass if needed: adjust your note ("reduce sparkle" or "keep natural skin texture") and regenerate.
- Save your top 2-3 results; variety helps you match different card designs.
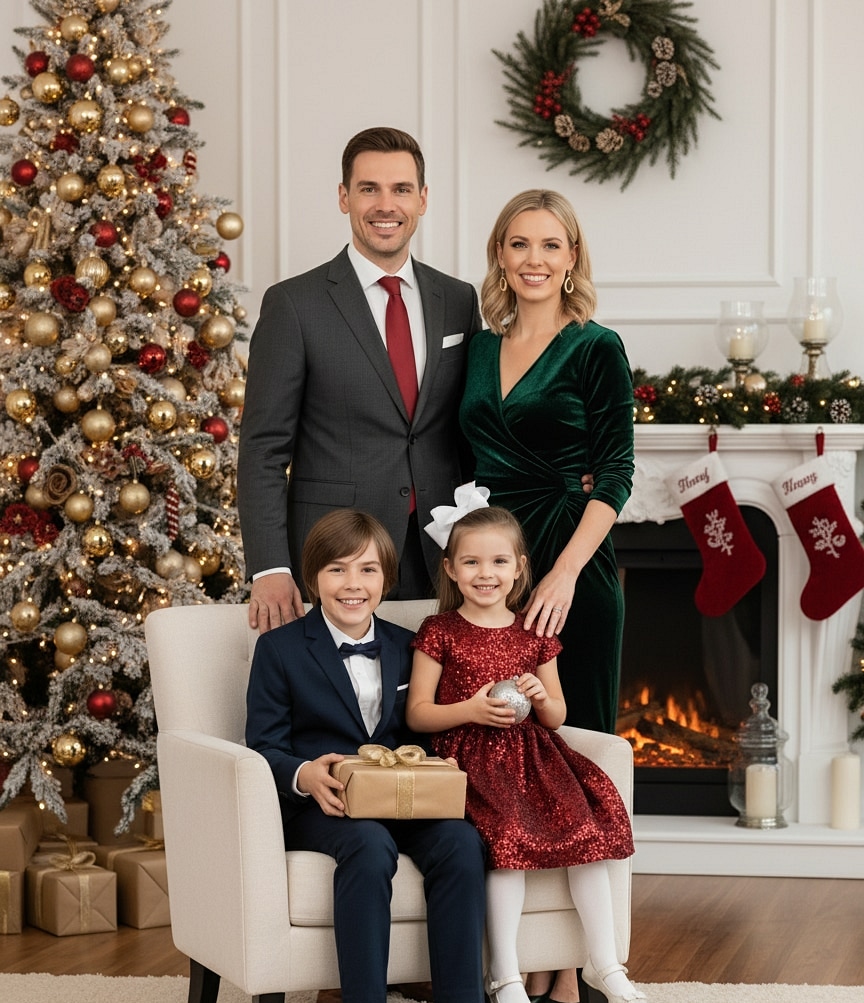
Before / After
Elegant Holiday Glow

Elegant Holiday Glow
Step 5: Make it print-ready for cards and frames
- Download the full-resolution file (864x1184 or higher) from your gallery.
- For 5x7 cards, keep at least 0.125 inch of safe margin; avoid pushing text to the edges.
- For Instagram, export a duplicate at 4x5 ratio so the platform does not crop faces.
- If ordering prints, request 300 DPI. At 864x1184, you can print crisp 4x6 and 5x7 cards without upscaling.
Section-by-section checklist you can reuse
Shoot day checklist
- Window or lamp light, no overhead shadows
- Neutral or single-color outfit plus one prop (mug, book, ornament)
- Shoulders relaxed, leave headroom
- 5-7 takes, pick the calmest expression
Upload checklist
- Highest-resolution original file (no screenshots)
- 1-2 lines of intent describing vibe and lighting
- Note any must-keep details (scarves, heirloom ornament, pet collar)
Review checklist
- Eyes sharp, fingers intact, jewelry not warped
- Background decor balanced; adjust prompt if one side is empty
- Save multiple options and crop duplicates for different channels
Situations and how to handle them
Small apartment, cluttered background
Ask for "shallow depth, blurred background" and choose Modern Minimal or Elegant Holiday so the AI rebuilds the room cleanly. Upload with a simple wall or curtain behind you to minimize objects that could warp.
Low-light evening photo
Brighten the original slightly before upload; mention "keep warm candlelight" if you want a fireplace look or "cool dusk" for snow presets. Avoid heavy noise reduction that erases skin texture.
Glasses glare
Tilt your head slightly away from the light source and raise the camera by 2-3 inches. In the note, add "keep glasses reflections soft" so the AI does not remove frames.
Active toddlers or pets
Photograph them seated or on your lap. Tell the AI "keep stuffed animal visible" or "keep leash and collar" so story details remain.
Tie your result back to the homepage hub
Every variation you generate reinforces the main topic of AI Christmas photo. When you publish or share your picture, link back to the homepage as your central guide and to related deep dives like how to get the best results from your AI Christmas photo and fixes for common AI Christmas photo problems so readers can learn and improve.
Final action plan
- Capture one calm, well-lit photo today.
- Upload it with a short style note on ThatMoment.Studio.
- Generate two presets, zoom in, and save the sharpest version.
- Download the high-res file and order 5x7 cards tonight.
Ready when you are—create your AI Christmas photo now and turn a single ordinary picture into the centerpiece of your holiday cards.
Related Topics:
Continue Reading
How to Get the Best Results from Your AI Christmas Photo
Exact inputs, lighting, prompts, and review steps that deliver the sharpest, most realistic AI Christmas photos on ThatMoment.Studio.
Cute AI Christmas Photo Ideas for Kids and Babies
Kid-safe AI Christmas photo ideas with poses, lighting, and safety tips so babies and toddlers look natural in every render.
Romantic AI Christmas Photo Ideas for Couples
Candid, cinematic AI Christmas photo ideas for couples—poses, prompts, and presets you can shoot at home and render in minutes.